This guide will walk you through setting up your live stream on Vimeo OTT. It covers everything from event settings and engagement tools to distribution options and key configurations.
In this article:
General
Once you've created your Vimeo OTT Event, navigate to the General tab to configure your stream settings. Depending on your Production Mode, you will either:
- Use an RTMP encoder (via Server URL and Stream Key)
- Use the Web-Based Studio
You can also enable Live Engagement features (Chat, Polls, Q&A) and set up descriptions and thumbnails, similar to adding information for any other video.
Configure Streaming via RTMP
1. Copy the stream key and server URL from Vimeo OTT.
2. Open your RTMP-compatible encoding software, such as:
3. Paste the stream URL and key into the corresponding fields in your encoder.
⚠️Note: If your encoder does not have a field for the stream key, use a forward slash (/) without spaces to the end of your RTMP URL.
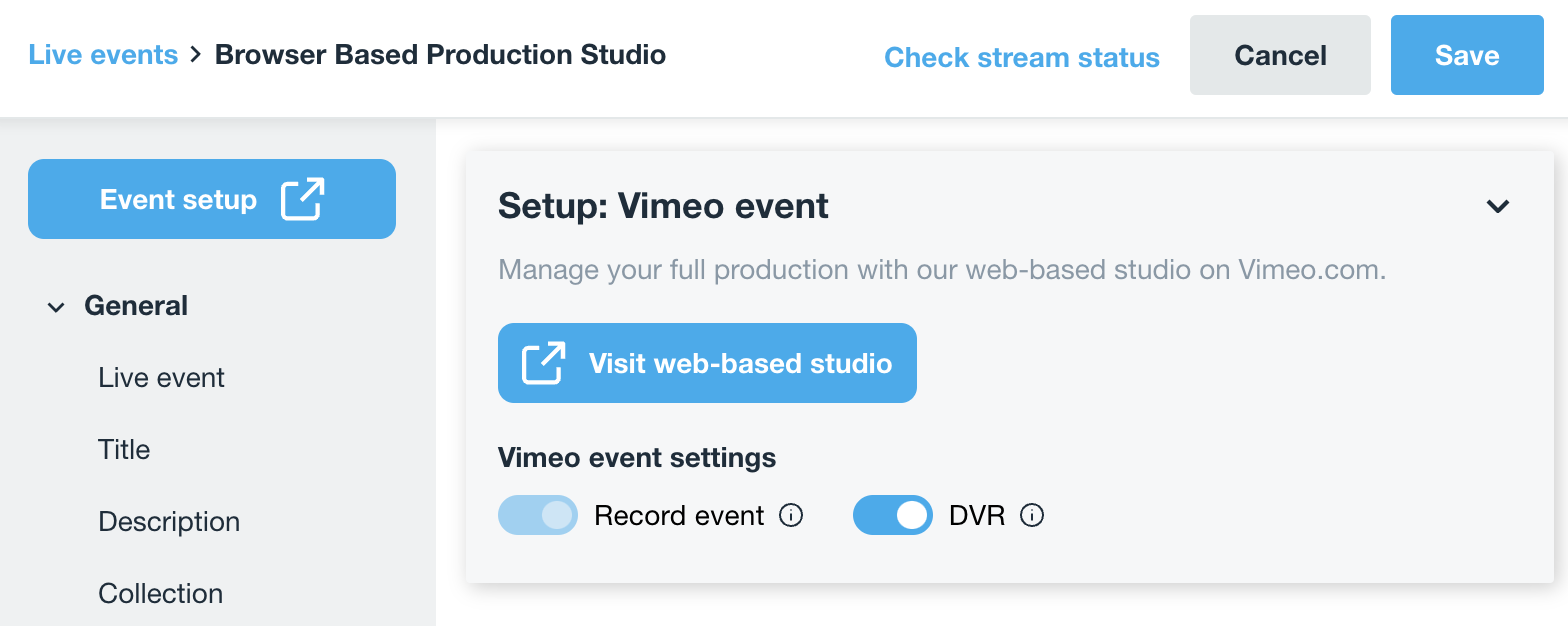
Configure Streaming via Web-Based Studio 
Previously, users had to manually connect Vimeo.com to OTT. Now, the Vimeo.com event is automatically linked to Vimeo OTT, requiring no additional setup.
Vimeo event settings
- Record Event - If you want your event to be available on your site after the stream concludes, enable this setting.
- DVR - The DVR (Digital Video Recording) feature allows your viewers to rewatch, catch up on missed content, or pause the live stream to resume watching it later while it is streaming.
- Extended Stream - Live events are limited to 12-hour durations. If Extended Stream is enabled, you will be able to stream for an unlimited duration.
- Record event - Enable this if you want viewers to access your stream after the event ends.
- DVR (Digital Video Recording)- Allows viewers to rewatch, pause, and resume the stream while it's still live.
- Extended stream
- Default live event length: 12 hours
- If the Extended stream is enabled, there is no time limit.
- Only available for RTMP streams and requires a paid add-on.
Contact your Vimeo OTT Account Manager if you do not see the Extended stream option.
Live Engagement
Located below the Full Description field is the Live Engagement section. This setting allows you to enable/disable:
- Live chat
- Polls
- Q&A
You can also choose whether or not to require users to log in before participating in the live engagement. Read about using Live Engagement tools on OTT.
Distribution
The Distribution tab provides comprehensive control over your video's accessibility and visibility. It helps you choose who can view your video, where it will be displayed, and whether viewers can leave comments. Importantly, you can customize these settings differently for the live event and the VOD version available after the live event concludes. This allows flexibility in managing the audience and engagement for the real-time broadcast and the archived recordings.
Select Archives to determine your end-of-stream behavior.
- Replace stream when event ends –The VOD version automatically replaces the live stream on the same page.
- Select this option if you do not plan to restream this event.
- If you do not select the option after the event ends, the event thumbnail will appear on the live event page, and you will be ready to stream your next event.
⚠️Note: Please note that since live events are recurring, the event will always appear if published. It can be unpublished manually via the live event settings in the OTT admin. When using the "Replace stream with latest VOD" option, the live event will still appear as off-air, and its thumbnail will still be displayed. Users will need to click on the event to see the VOD version.
Customize VOD Distribution
- Use live event settings – Keeps the same distribution settings as the live event for VOD.
- Custom settings – You can edit distribution settings for VOD separately (e.g., Subscription plans, Collections, Categories, Products, Region).
Notify Followers
Enable Notify followers when the broadcast begins to automatically send an email notification.
- Email notifications can take up to 30 minutes to arrive.
- It is recommended to start with a slate image or manually notify followers 30-60 minutes before streaming.
- Branded app users will NOT receive push notifications.
Discovery
Under the Discovery tab, you can configure various metadata for your event to make your event easier to find in search results, such as Tags, Genres, Cast, Crew, Rating, Advisory, License, Media ID, and other Advanced Image and Custom Metadata.
Next steps
Learn about creating, starting, and ending a live stream.
Following this guide, you can seamlessly configure a Vimeo OTT live event while maximizing visibility and audience engagement.